Hawaiian Mochi Butter Cake
As an Amazon Associate and member of other affiliate programs, I earn from qualifying purchases.
What makes you happy? To me, often it’s friends and family sharing new recipes with me to try. Just like this Hawaiian Mochi Butter Cake. Well, it’s not really a new thing in the culinary world. It’s been around a while and I heard quite popular in Hawaii. My cousin asked me if I had ever baked a Hawaiian Mochi Butter Cake and then in the same breath shared her recipe with me. I was delighted. I got baking right away.
If you haven’t had this yet, this is a cake dessert that is Hawaiian-inspired. It is popular in the state of Hawaii. Convenience stores and food stores offer it. Now, I love Hawaii and we enjoyed our family vacation there a few years ago. But I can’t fly to Hawaii right now. So, I’ll do the next best thing and bake the Hawaiian Mochi Butter Cake.
This mochi cake is made from sweet rice flour. I used the Mochiko brand which was available at our neighborhood grocery. To the unfamiliar, rice flour is made from finely milled rice. It is a fine, white powder. I use it often when cooking kakanins (Filipino rice cakes). Rice flour can also be used as a thickening agent, is an ingredient for noodles and makes delightful desserts just like this one. There are two kinds of rice flour: the glutinous and non-glutinous. The glutinous rice flour is also called ‘sweet rice’, though it’s not sweet. The non-glutinous rice flour is made from short-grain rice. I used these according to what’s specified on recipes.
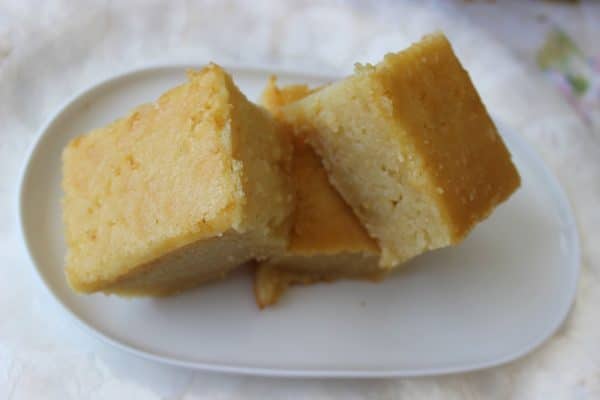
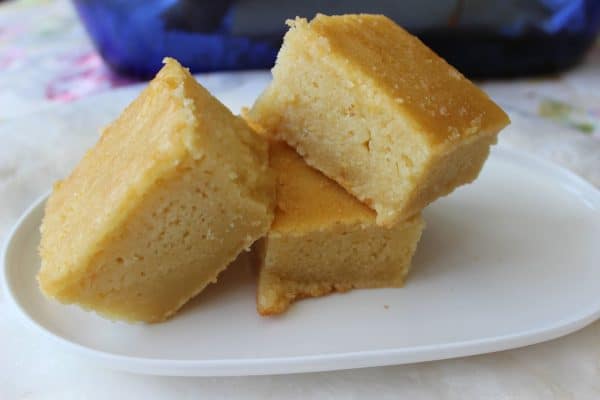
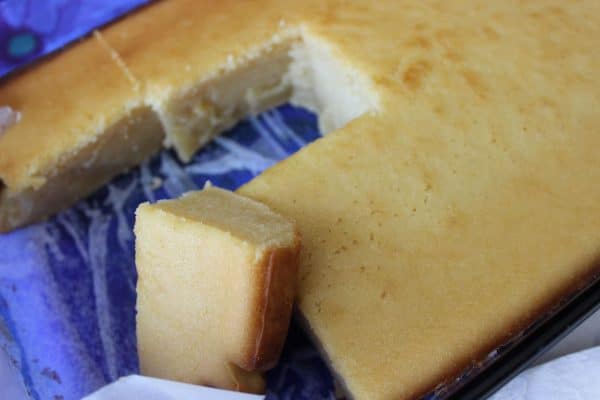
This is a mix-it-all kind of cake and once the ingredients are well-blended you simply pour the batter into a cake pan. Let the oven do your work by baking it for one hour. As I poured the thick, light yellow batter, I got excited for the outcome while I watched the lush liquid slowly fill up the rectangle cake pan. Once I took it out of the oven, the buttery aroma of the cake reminded me of a baked cassava cake. When I sliced the thick, dense golden yellow cake into bite-sized squares, the cake’s chewy texture reminded me of cassava cake again. The newly-baked Mochi cake was fluffy as I slid my fork into the slice. While still warm, the cake felt as light as a cloud. And the flavor was just as I hoped it would be: like a lighter version of a rich cassava cake.
So what makes you happy? For me, it’s delightful book to read or a well-written, thought-provoking article leaves me inspired. Hearing my favorite song or music through the air waves on a bright, sunny day makes me feel optimistic. It’s the small, simple pleasures that clears my mind, fires up my spirit and gets me going to face every new day. And of course, family recipes like this one, passed on to give sweet endings to our meal.
Hawaiian Mochi Butter Cake
Equipment
- Baking pan: 9 x 13 inches
- Electric cake mixer
- Mixing bowls
Ingredients
- 1/2 cup unsalted melted butter
- 1 1/2 cups granulated sugar
- 5 whole large eggs
- 1 teaspoon pure vanilla extract
- 1 box (16 oz.) Mochiko sweet rice flour 16 oz. Mochiko rice flour
- 1 1/2 teaspoons baking powder
- 1 can (12 oz.) coconut cream
- 1 can (14 oz) coconut milk
Instructions
- Preheat oven to 350 F. Pre-grease with cooking spray a metal or glass baking pan measuring about 9 x 13 inches. Set aside.
- In a large mixing bowl, combine the butter and sugar. Using an electric mixer, blend well.
- Add the eggs one at a time. Continue mixing. Then add the vanilla extract and incorporate well into the batter.
- Pour the coconut cream and coconut milk into the mixture. Beat for 2 minutes till blended.
- Add the Mochiko sweet rice flour and baking powder. Mix ingredients well till batter is smooth and free of lumps.
- Pour into the pre-greased baking pan. Bake at 350 F for one hour. Test if cake is done by piercing the tip of a small knife at the center. If knife comes clean, the Mochi Cake is done. Slice into 2-inch pieces. Serve warm or chilled.
- Cook's commentsStorage: Store the cake, covered, in the refrigerator at all times. To serve warm, reheat slices in the microwave. In the freezer, wrap and cover tightly with plastic wrap, then with foil and keep in a covered plastic container. This can freeze well for up to 1 month. When ready to eat, thaw and heat in the microwave or toast in the toaster oven.
- Copyright Notice:*Hello, Friends! Please DO NOT LIFT OR PLAGIARIZE my original recipe. All the images and content on this blog are COPYRIGHT PROTECTED and owned by my media company Besa-Quirino LLC. This means BY LAW you are NOT allowed to copy, scrape, lift, frame, plagiarize or use my photos and recipe content I wrote, on your website,books, films, television shows or videos without my permission. If you want to republish this recipe or content on another website, video, news article,or media outlets mentioned above please ASK my permission, re-write it in your own words and simply link back to this blog to give proper attribution. It’s the legal thing to do. Thank you. Email me at [email protected]
Nutrition
Nutrition Notes: The nutrition information provided is an estimate and will vary based on cooking or baking methods and brands of ingredients used.
Did you love this recipe? I have more Philippine dessert recipes in my popular cookbook How to Cook Philippine Desserts, Cakes and Snacks.
If you need Filipino Instant Pot recipes, find more in my newest cookbook Instant Filipino Recipes: My Mother’s Traditional Philippine Cooking in A Multicooker Pot. Buy my cookbooks and books on Amazon.com sold worldwide in paperback and Kindle format.
Copyright Notice: Hello, Friends! Please DO NOT LIFT OR PLAGIARIZE my original recipe, stories, photos or videos. All the images and content on this blog are COPYRIGHT PROTECTED and owned by my media company Besa-Quirino LLC. This means BY LAW you are NOT allowed to copy, scrape, lift, frame, plagiarize or use my photos, essays, stories and recipe content on your websites, books, films, television shows, videos, without my permission. If you wish to republish this recipe or content on media outlets mentioned above, please ASK MY PERMISSION, or re-write it in your own words and link back to my blog AsianInAmericaMag.com to give proper attribution. It is the legal thing to do. Thank you. Email me at [email protected].



2 Comments