Fried Chicken – Bone-in – Air Fryer
As an Amazon Associate and member of other affiliate programs, I earn from qualifying purchases.
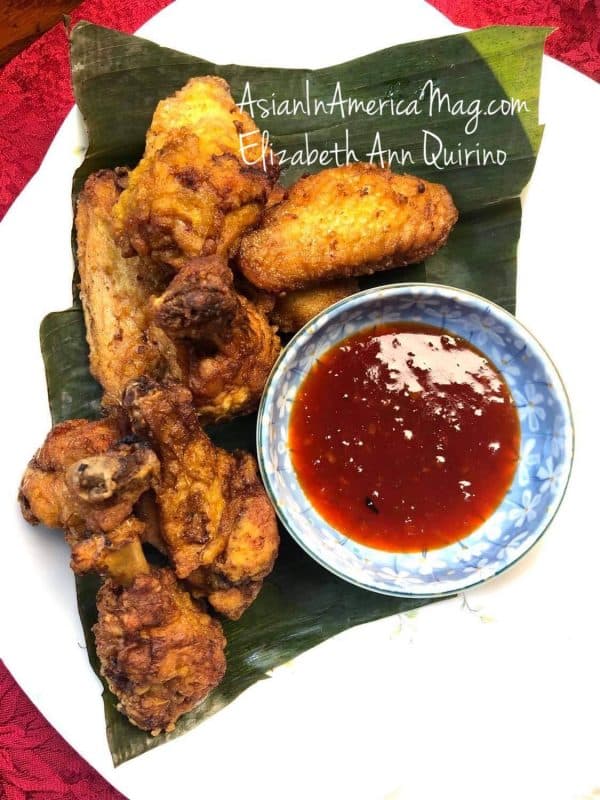
Every now and then we indulge in crisp chicken, marinated Filipino-style with patis and calamansi. Like this Fried Chicken- cooked in the Air Fryer. I was cooking with less guilt because an Air Fryer does just that, it cooks with hot air circulating, and not with oil.
On a different day, I also tried to deep fry the chicken in hot oil. I had previously marinated the bone-in cutlets the same way. It took longer to cook on the stove-top. Plus, the hot searing oil was jumping out of the skillet onto my hands and arms.
The results of cooking were good, for both alternate ways, on separate days.
Fried Chicken in the Air Fryer
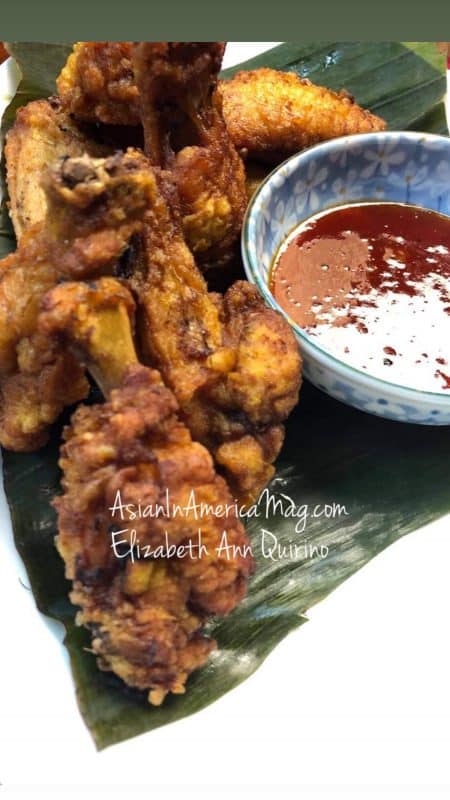
The chicken pieces cooked in less time. They were crisp all over, but without the grease. But the Air Fryer heat dries up the chicken meat, so you have to serve the dish right after it comes out. The deliciousness of something so crisp, yet with no excess oil is unbelievable though.
Fried Chicken – stovetop
This is crispy cooking, the old-fashioned way. It is greasy, but the oil clinging to the meat adds to the chicken’s succulence. This method took longer. And I did not care for the hot oil that splattered on my hands, arms, face and neck. Plus, the clean-up of the stovetop and counters added to the time spent in the kitchen.
Both ways, it was good-old fried chicken, Pinoy-style. I still had the bounty of calamansi purchased from a local grower, so, I had the chicken soaking in the citrusy juice with patis (fish sauce), water, garlic powder, and black pepper before cooking. Once ready to serve, be sure to have catsup at the table. The sweetness of the sauce complements the salty crunch. This is sheer heaven when you need comfort food.
*If you want to pair this Fried Chicken with banana ketchup, here’s my Homemade Banana Ketchup recipe for Simply Recipes. Click here.
Fried Chicken - Bone-in - Air Fryer
Equipment
- Ninja Foodi Grill - Air Fryer - if cooking with this method.
- Large skillet or Wok - 14 inches in diameter; for stovetop deep-frying
Ingredients
For chicken marinade:
- 8 pieces chicken cutlets, bone-in, skin-on, combination legs, thighs, wings
- ½ cup calamansi juice (or use lemon)
- ½ cup patis (fish sauce)
- 1 cup water
- 1 teaspoon garlic powder
- ½ teaspoon ground black pepper
For cooking chicken:
- ½ cup rice flour, to coat chicken
- cooking spray, if using Air Fryer
- ½ cup vegetable oil, if deep-frying stovetop
For serving:
- catsup, banana or tomato
- steamed rice
Instructions
To cook chicken in the Ninja Foodi Grill - Air Fryer (option 1)
- Marinate chicken: In a bowl, combine the marinade ingredients: --calamansi juice, patis, and water. Stir well. Add the garlic powder and black pepper powder. Coat the chicken well with all the ingredients. Place marinated chicken in a large resealable plastic bag or container. Store in the refrigerator to marinate for at least 6 hours or overnight.
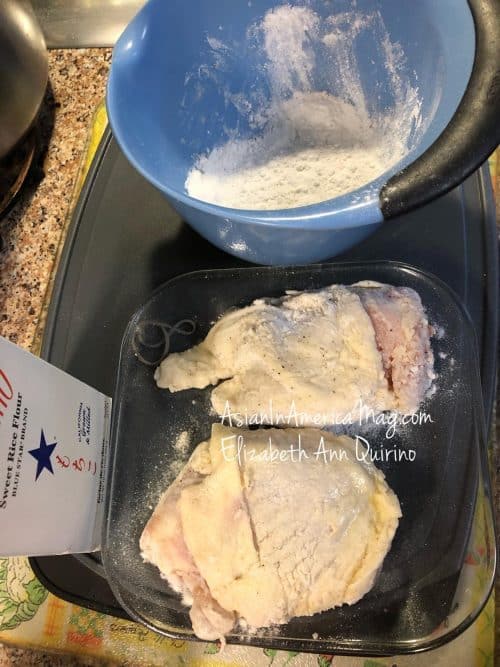
- When ready to cook in the Air Fryer. Remove chicken from its liquid marinade. Discard the liquids. Pat dry with paper towels.Dredge the chicken pieces in rice flour. Coat the meat evenly. Shake the pieces to remove excess flour - you don't want the skin to get lumpy after frying.Spray each piece lightly with cooking spray.
- Before turning on the Air Fryer appliance, grease the inside basket with cooking spray. Preheat the Air Fryer at 390 F, according to product manual directions (please read manual). When the digital display says "Add Food", the pre-heating is done, and it's time to air-fry.Open the lid. Using a pair of long tongs, place the chicken pieces inside the pre-greased basket, side by side, without overlapping ,inside the Air Fryer basket. Do NOT use your hands to add the chicken, and do not put your fingers inside the hot basket. (Note: If you own a small Air Fryer, the 8 chicken pieces will not fit. Do not overcrowd the basket. You will have to air-fry in 2 batches).Click on the timer to set the cooking time between 25 to 28 minutes at 390 F. Close the lid. The Air Fryer will emit a loud noise, like that of an electric fan. When the timer turns off to signal cooking the chicken is done, remove the meat with the long pair of tongs. Serve warm with rice and catsup on the side.
To deep-fry chicken on the stovetop: (option 2)
- Marinate the chicken pieces in the liquids and dry ingredients indicated above. Keep the chicken marinating in the refrigerator for 6 hours or up to overnight.When ready to cook, pat the chicken pieces dry with paper towels.Coat the chicken with rice flour, shaking off any excess.In a deep, large skillet over medium-high heat, add the vegetable oil. When oil is hot enough (about 350 F if using a thermometer), add the chicken pieces using a long pair of tongs. Place the chicken pieces side by side inside the skillet or wok with hot oil. Do not overlap the meat. Deep-fry the chicken for 45 to 50 minutes. Turn the pieces half way through cooking, to fry evenly. Use a splatter screen if the hot oil jumps all over the stovetop.When chicken is done, remove the meat with the tongs. Rest the chicken on parchment paper to take off the excess grease.Serve warm with rice and catsup on the side.
Cook's comments:
- 1)You can use other chicken cuts for this dish. You can also cook boneless, and skinless chicken, which will cook in less time. Check the cooking guide included in the product manual for correct cooking time.2) The amount of patis in this recipe for the marinade can make the chicken very salty. This is why I added the same amount of calamansi juice and water to dilute the saltiness. There is no need to add salt in the recipe if there is this much patis.3)I used a Ninja Foodi Grill for cooking, which is the appliance I own. There are other brands of this appliance. Feel free to use what you prefer or is available.4) Homemade Banana Ketchup is great to serve alongside crisp Fried Chicken. Here's my recipe for Simply Recipes.
Disclosure:
- This is not an ad. I was not paid to enorse the Ninja Foodi Grill appliance. My opinions are my own.*A Ninja Foodi Grill is a brand-name of an indoor, counter-top appliance that has multi-functions: It can air-fry, grill, roast, sear, or bake. For more product information, or for other brands of similar appliances, please consult the manual.
Nutrition
Notes on Nutrition: The nutrition information provided in the recipe links is an estimate and will vary based on cooking methods and specific brands of ingredients used.
Copyright Notice: Hello, Friends! Please DO NOT LIFT OR PLAGIARIZE Asian in America recipes on this blog, my original recipes, stories, photos or videos. All the images and content on this blog are COPYRIGHT PROTECTED and owned by my media company Besa-Quirino LLC by Elizabeth Ann Quirino. This means BY LAW you are NOT allowed to copy, scrape, lift, frame, plagiarize or use my photos, essays, stories and recipe content on your websites, books, films, television shows, videos, without my permission. If you wish to republish this recipe or content on media outlets mentioned above, please ASK MY PERMISSION, or re-write it in your own words and link back to my blog AsianInAmericaMag.com to give proper attribution. It is the legal thing to do. Thank you. Email me at [email protected]

